
Media Street have been offering a diverse range of digital services to local and international businesses for over 10 years. With a credible client portfolio and a wide knowledge of all-things-digital, we have helped businesses grow through creative website and graphic design, successful marketing campaigns and competitive hosting packages, plus much more. Take a further look into our latest news articles, learn more about our staff and how we can help your business excel with our FAQs and testimonials
Access and Manage your accounts with Media Street. To login to your client areas please select the relavent link below.
We're proud to be a full service digital agency. For a list of our services please navigate services using the menu to the left, or choose a service category below.
Alternatively you can view all of our services below:
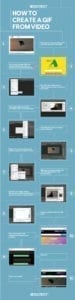
View AllHi my name is Tom. I’m a designer here at Media Street, today I’m going to show you how to create a GIF file from your video, logo animation or photos.
What is a GIF you wonder? GIF stands for Graphic Interchange Format… Graphic what?! Basically, it’s a file format for image files that supports both animated and static images. The interesting side of this format of course, is the animated side!
Over the past 10 years GIFs have become to be more and more popular, and they’re now being recognised as a great marketing tool. Twitter, Tumblr, Google have been using GIF’s for quite a long time now, and a few months ago Facebook joined the trend as well, opening up more opportunities to grab in the marketing world.
[bctt tweet=”An animated GIF can pull in 12% more revenue than their non-animated versions” username=”mediastreet”]
Step 1. Choose your favorite video scene, you’d like to convert into a GIF.
It can be your logo’s animation or even just a scene from a cartoon to attach it to your social media post, to make your clients and customers giggle. Everyone likes to smile right?
Step 2 .If your video is on YouTube, then Go to www.videograbby.com paste the link of the video you choose, and click download video, and a few seconds later you will have your video in mp4 format on your computer.
Step 3. Open Photoshop up, click on File, Import , Video Frames to Layers, and wait till the software process your video file.
Step 4. Once it’s done with the processing a window will pop up,where you can select the range on the video you’d like to use, try to keep it short, to keep the final file’s size small.
Also tick the box at the “Limit to Every” and type “2” next to it, which indicates that PS will drop every second frames helping to keep the files size small.
Step 5. Select Window menu, and then click on Timeline so you can finally start the actual creation process of your GIF
Step 6. Delete the unnecessary frames, as you might imported a few unwanted ones too.
At this step you basically setup what will the viewer see on the final GIF,
You can play with adjustment layers, or adding text or extra elements to the animation, animating text etc
This is the part where you can let your creative side go wild.
Step 7. When you are happy with your master creation, click on the File, then Export , and Save for Web
Step 8. The Save for Web window will pop up, and here you can play around with the settings to reduce the file size to your needs. If you want the GIF Looping Forever you can set it in the Looping Option which means your GIF will repeat itself as long as it’s on the viewer’s screen. Master the Looping can result in amazing and professional looking GIFs, so it’s worth spending time on it.
Step 9. Save it to a place where you will find it.
Step 10. If you want to upload it to the a web surface, where it’s easier to share it from www.giphy.com is the right place to do that. Click on upload, and then just drag and drop the file
Step 11. Wait till it’s done
Step 12. Share it with the world
I hope this twelve steps will be helpful. Let us know if you have any questions about GIFS using the comment section below. Happy Giffing!


 01392 914033